快速入門HarmonyOS的Java UI框架的教程
本文檔適用于HarmonyOS應(yīng)用開發(fā)的初學(xué)者。編寫兩個簡單的頁面,實現(xiàn)在第一個頁面點擊按鈕跳轉(zhuǎn)到第二個頁面。
注意:運行Hello World在創(chuàng)建工程時,設(shè)備類型和模板分別以Wearable和Empty Feature Ability(Java)為例,本文檔也基于相同的設(shè)備類型和模板進行說明。
編寫第一個頁面
在Java UI框架中,提供了兩種編寫布局的方式:在XML中聲明UI布局和在代碼中創(chuàng)建布局。這兩種方式創(chuàng)建出的布局沒有本質(zhì)差別,為了熟悉兩種方式,我們將通過XML的方式編寫第一個頁面,通過代碼的方式編寫第二個頁面。
XML編寫頁面
在“Project”窗口,打開“entry > src > main > resources > base”,右鍵點擊“base”文件夾,選擇“New > Directory”,命名為“l(fā)ayout”。
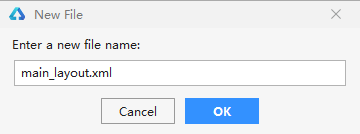
鍵點擊“l(fā)ayout”文件夾,選擇“New > File”,命名為“main_layout.xml”。
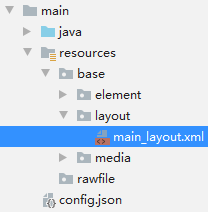
在“l(fā)ayout”文件夾下可以看到新增了“main_layout.xml”文件。
打開“main_layout.xml”文件,添加一個文本和一個按鈕,示例代碼如下:
<?xml version='1.0' encoding='utf-8'?><DependentLayout xmlns:ohos='http://schemas.huawei.com/res/ohos' ohos: ohos: ohos:background_element='#000000'> <Text ohos: ohos: ohos: ohos:center_in_parent='true' ohos:text='Hello World' ohos:text_color='white' ohos:text_size='32fp'/> <Button ohos: ohos: ohos: ohos:text_size='19fp' ohos:text='Next' ohos:top_padding='8vp' ohos:bottom_padding='8vp' ohos:right_padding='80vp' ohos:left_padding='80vp' ohos:text_color='white' ohos:background_element='$graphic:button_element' ohos:center_in_parent='true' ohos:align_parent_bottom='true'/></DependentLayout>
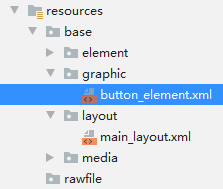
上述按鈕的背景是通過“button_element”來顯示的,需要在“base”目錄下創(chuàng)建“graphic”文件夾,在“graphic”文件夾中新建一個“button_element.xml”文件。
“button_element.xml”的示例代碼如下:
<?xml version='1.0' encoding='utf-8'?><shape xmlns:ohos='http://schemas.huawei.com/res/ohos' ohos:shape='oval'> <solid ohos:color='#007DFF'/></shape>
說明:如果DevEco Studio提示xmlns字段錯誤,請忽略,不影響后續(xù)操作。
加載XML布局
在“Project”窗口中,選擇“entry > src > main > java > com.example.helloworld > slice” ,打開“MainAbilitySlice.java”文件。重寫onStart()方法加載XML布局,示例代碼如下:
package com.example.myapplication.slice; import com.example.myapplication.ResourceTable;import ohos.aafwk.ability.AbilitySlice;import ohos.aafwk.content.Intent; public class MainAbilitySlice extends AbilitySlice { @Overridepublic void onStart(Intent intent) {super.onStart(intent);super.setUIContent(ResourceTable.Layout_main_layout); // 加載XML布局} @Overridepublic void onActive() {super.onActive();} @Overridepublic void onForeground(Intent intent) {super.onForeground(intent);}}
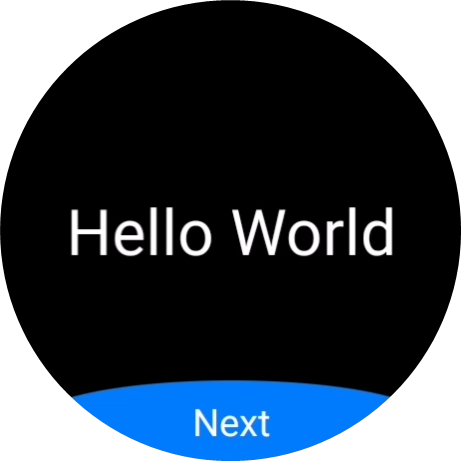
效果如圖所示:
創(chuàng)建另一個頁面
創(chuàng)建Feature Ability
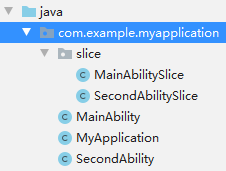
在“Project”窗口,打開“entry > src > main > java”,右鍵點擊“com.example.myapplication”文件夾,選擇“New > Ability > Empty Feature Ability(Java)”。配置Ability時,將“Page Name”設(shè)置為“SecondAbility”,點擊“Finish”。創(chuàng)建完成后,可以看到新增了“SecondAbility”和“SecondAbilitySlice”文件。
代碼編寫界面
在上一節(jié)中,我們用XML的方式編寫了一個包含文本和按鈕的頁面。為了幫助開發(fā)者熟悉在代碼中創(chuàng)建布局的方式,接下來我們使用此方式編寫第二個頁面。
打開 “SecondAbilitySlice.java”文件,添加一個文本,示例代碼如下:
package com.example.myapplication.slice; import ohos.aafwk.ability.AbilitySlice;import ohos.aafwk.content.Intent;import ohos.agp.colors.RgbColor;import ohos.agp.components.DependentLayout;import ohos.agp.components.DependentLayout.LayoutConfig;import ohos.agp.components.Text;import ohos.agp.components.element.ShapeElement;import ohos.agp.utils.Color; import static ohos.agp.components.ComponentContainer.LayoutConfig.MATCH_PARENT;import static ohos.agp.components.ComponentContainer.LayoutConfig.MATCH_CONTENT; public class SecondAbilitySlice extends AbilitySlice { @Override public void onStart(Intent intent) { super.onStart(intent); // 聲明布局 DependentLayout myLayout = new DependentLayout(this); // 設(shè)置布局大小 myLayout.setWidth(MATCH_PARENT); myLayout.setHeight(MATCH_PARENT); ShapeElement element = new ShapeElement(); element.setRgbColor(new RgbColor(0, 0, 0)); myLayout.setBackground(element); // 創(chuàng)建一個文本 Text text = new Text(this); text.setText('Nice to meet you.'); text.setWidth(MATCH_PARENT); text.setTextSize(55); text.setTextColor(Color.WHITE); // 設(shè)置文本的布局 DependentLayout.LayoutConfig textConfig = new DependentLayout.LayoutConfig(MATCH_CONTENT,MATCH_CONTENT); textConfig.addRule(LayoutConfig.CENTER_IN_PARENT); text.setLayoutConfig(textConfig); myLayout.addComponent(text); super.setUIContent(myLayout); } @Override public void onActive() { super.onActive(); } @Override public void onForeground(Intent intent) { super.onForeground(intent); }}
實現(xiàn)頁面跳轉(zhuǎn)
打開第一個頁面的“MainAbilitySlice.java”文件,重寫onStart()方法添加按鈕的響應(yīng)邏輯,實現(xiàn)點擊按鈕跳轉(zhuǎn)到下一頁,示例代碼如下:
package com.example.myapplication.slice; import com.example.myapplication.ResourceTable;import ohos.aafwk.ability.AbilitySlice;import ohos.aafwk.content.Intent;import ohos.aafwk.content.Operation;import ohos.agp.components.*; public class MainAbilitySlice extends AbilitySlice { @Override public void onStart(Intent intent) { super.onStart(intent); super.setUIContent(ResourceTable.Layout_main_layout); Button button = (Button) findComponentById(ResourceTable.Id_button); if (button != null) { // 為按鈕設(shè)置點擊回調(diào) button.setClickedListener(new Component.ClickedListener() {@Overridepublic void onClick(Component component) {Intent secondIntent = new Intent();// 指定待啟動FA的bundleName和abilityNameOperation operation = new Intent.OperationBuilder() .withDeviceId('') .withBundleName('com.example.myapplication') .withAbilityName('com.example.myapplication.SecondAbility') .build();secondIntent.setOperation(operation);startAbility(secondIntent); // 通過AbilitySlice的startAbility接口實現(xiàn)啟動另一個頁面} }); } } @Override public void onActive() { super.onActive(); } @Override public void onForeground(Intent intent) { super.onForeground(intent); }}
再次運行項目,效果如圖所示:

總結(jié)
到此這篇關(guān)于快速入門HarmonyOS的Java UI框架的文章就介紹到這了,更多相關(guān)HarmonyOS的Java UI框架內(nèi)容請搜索好吧啦網(wǎng)以前的文章或繼續(xù)瀏覽下面的相關(guān)文章希望大家以后多多支持好吧啦網(wǎng)!
相關(guān)文章:
1. ajax實現(xiàn)省市三級聯(lián)動效果2. ASP基礎(chǔ)入門第二篇(ASP基礎(chǔ)知識)3. JSP出現(xiàn)中文亂碼問題解決方法詳解4. vue的路由動畫切換頁面無法讀取meta值的bug記錄5. 不使用XMLHttpRequest對象實現(xiàn)Ajax效果的方法小結(jié)6. 怎樣打開XML文件?xml文件如何打開?7. ASP.NET MVC實現(xiàn)登錄后跳轉(zhuǎn)到原界面8. jsp實現(xiàn)簡單用戶7天內(nèi)免登錄9. ASP.NET MVC限制同一個IP地址單位時間間隔內(nèi)的請求次數(shù)10. Spring依賴注入的三種方式實例詳解
 網(wǎng)公網(wǎng)安備