python 使用uiautomator2連接手機(jī)設(shè)備的實(shí)現(xiàn)
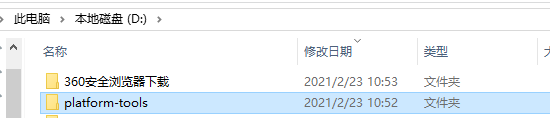
地址:https://developer.android.google.cn/studio/releases/platform-tools?hl=en下載對(duì)應(yīng)環(huán)境的工具 解壓
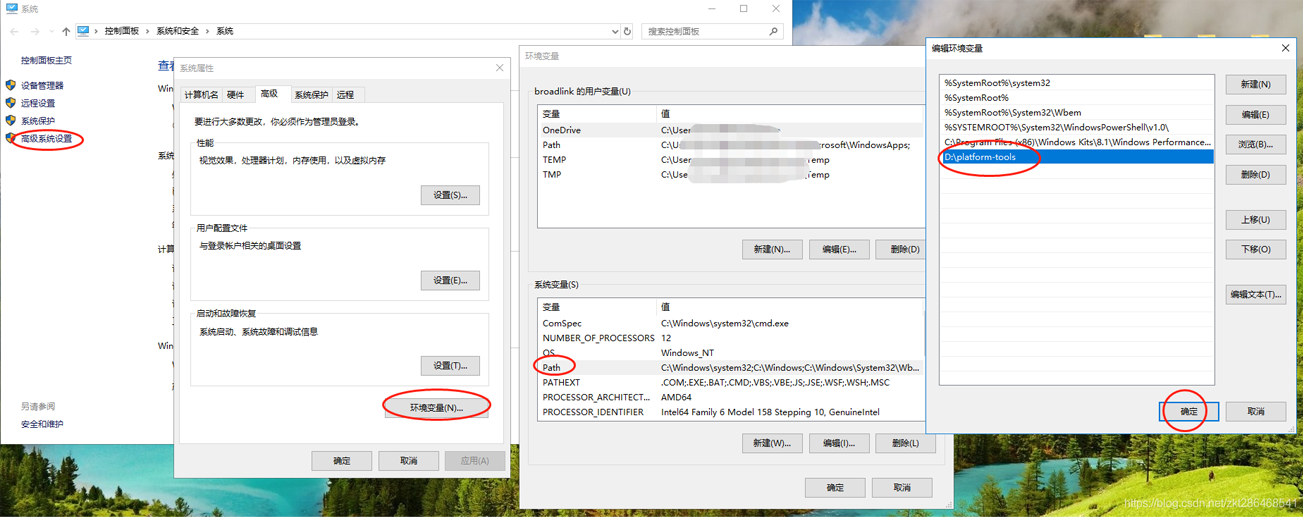
之后設(shè)置環(huán)境變量
右鍵我的電腦->屬性 然后按下圖順序 最后添加platform-tools的路徑保存即可
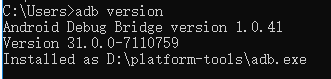
設(shè)置好后cmd打開命令行
輸入adb version
可以查看adb版本信息 ok~
python下載uiautomator2包
pip install --pre uiautomator2
使用數(shù)據(jù)線將手機(jī)與電腦相連 使用開發(fā)者模式在電腦命令行輸入
python -m uiautomator2 init
進(jìn)行初始化手機(jī)同一安裝atx 和com.github.uiautomator.test
如果需要wifi連接 adb需要tcpip連接模式所以在數(shù)據(jù)線連接時(shí)我們需要設(shè)定端口
adb tcpip 55663.測(cè)試連接
手機(jī)與電腦連接同一個(gè)局域網(wǎng)手機(jī)連接wifi后 ip為 192.168.0.102adb連接手機(jī)設(shè)備

python測(cè)試如下
import uiautomator2 as u2#d = u2.connect() # 有線連接,手機(jī)需要插電腦上 d = u2.connect('192.168.0.102:5566') #通過無線連接,電腦和手機(jī)需要在同一個(gè)局域網(wǎng)內(nèi),并且需要先用有線的方式做過初始化print(d.info)
輸出設(shè)備信息
{‘currentPackageName’: ‘com.bbk.launcher2’, ‘displayHeight’: 2160, ‘displayRotation’: 0, ‘displaySizeDpX’: 360, ‘displaySizeDpY’: 720, ‘displayWidth’: 1080, ‘productName’: ‘PD1709’, ‘screenOn’: True, ‘sdkInt’: 27, ‘naturalOrientation’: True}
連接成功
到此這篇關(guān)于python 使用uiautomator2連接手機(jī)設(shè)備的實(shí)現(xiàn)的文章就介紹到這了,更多相關(guān)python uiautomator2連接手機(jī)設(shè)備內(nèi)容請(qǐng)搜索好吧啦網(wǎng)以前的文章或繼續(xù)瀏覽下面的相關(guān)文章希望大家以后多多支持好吧啦網(wǎng)!
相關(guān)文章:
1. jsp網(wǎng)頁(yè)實(shí)現(xiàn)貪吃蛇小游戲2. JSP動(dòng)態(tài)網(wǎng)頁(yè)開發(fā)原理詳解3. Vue Element UI自定義描述列表組件4. windows下安裝PHP性能分析工具 xhprof 筆記5. Python中tkinter+MySQL實(shí)現(xiàn)增刪改查6. 源碼分析MinimalApi是如何在Swagger中展示7. python json 遞歸打印所有json子節(jié)點(diǎn)信息的例子8. Java SE 6 : Classpath通配符和OutOfMemeory Error檢測(cè)9. js實(shí)現(xiàn)經(jīng)典掃雷游戲10. Geronimo 2.0 M1發(fā)布 支持Java EE
 網(wǎng)公網(wǎng)安備